
Did you know changing your oil yourself can save up to 60%? It's true. Dann's Discount Auto Sales is here to show you how easy it is. This basic car maintenance task takes 30 to 60 minutes, and you don't need to be a mechanic to get started.
Professional oil changes cost between $35 and $75 for regular oil, while synthetic oil changes run $65 to $125. But doing it yourself only costs $20 to $55. That's a lot of money saved over the life of your vehicle.
DIY Oil Change Savings
By performing your own oil changes, you can save $15 to $70 per service compared to professional shops. Over a year of regular maintenance, that adds up to hundreds of dollars back in your pocket.
We want to help our Tulare, CA customers take care of their cars. This guide covers everything you need to know, from gathering tools to how to dispose of the old oil properly. If you need help or prefer a pro, our team at Dann's Discount Auto Sales is here for you.
Getting Ready: Oil Change Tools Needed and Preparation
Starting a DIY oil change is more than just draining oil. It begins with the right tools and knowing what your car needs. At Dann's Discount Auto Sales in Tulare, CA, we help our customers prepare well. This ensures safety and success, whether it's your first oil change or your hundredth.
Many DIYers start their project only to find they're missing a key tool. This is frustrating and wastes time. Let's make sure you have everything ready before you start working on your vehicle.
Essential Tools and Materials for Engine Oil Replacement
Having the right tools makes a big difference. A 45-minute job can turn into a frustrating afternoon without them. We recommend gathering everything on this checklist before you start working on your vehicle.
Basic Essentials
Fresh motor oil, new oil filter, oil drain pan, wrench set, ratchet, and oil filter wrench or filter pliers
Safety Equipment
Nitrile gloves, safety glasses, floor jack with jack stands or wheel ramps, and wheel chocks
Helpful Extras
Creeper, magnetic work light, brake cleaner, funnel, clean rags, and newspaper for floor protection
Start with the basics: fresh motor oil, a new oil filter, and an oil drain pan. You'll also need a wrench set and ratchet to remove the drain plug. An oil filter wrench or filter pliers help remove the old filter without making a mess.
For access and positioning, use a floor jack with jack stands or wheel ramps. Never rely on a jack alone—always use jack stands for safety. Wheel chocks prevent your vehicle from rolling unexpectedly.
Understanding Synthetic vs Conventional Oil for Your Vehicle
Choosing between synthetic and conventional oil affects your vehicle's performance and maintenance schedule. Let's break down the differences so you can make an informed decision for your specific situation.
Conventional oil is the traditional choice and the most budget-friendly option. It's refined from crude oil but not as extensively processed as synthetic options. This type typically requires changes every 3,000 to 5,000 miles depending on your driving conditions.
Synthetic blend oil offers a middle ground between conventional and full synthetic. It combines conventional base oil with synthetic components, providing improved protection at a midrange price point. This option works well for drivers who want better performance without the premium cost.
Full synthetic oil is the most refined and expensive option, but it delivers superior engine protection and consistent viscosity across temperature ranges. Mobil 1 advanced full synthetic motor oils can provide outstanding engine protection for 10,000 miles and beyond. Synthetic oils have been proven to outperform conventional motor oils in laboratory tests and real-world conditions.
| Oil Type | Price Range | Change Interval | Best For |
|---|---|---|---|
| Conventional | Budget-friendly | 3,000-5,000 miles | Older vehicles, light driving |
| Synthetic Blend | Mid-range | 5,000-7,500 miles | Moderate driving, towing |
| Full Synthetic | Premium | 7,500-10,000+ miles | High-performance, extreme conditions |
Important note: Some vehicles require full synthetic oil. If your owner's manual specifies synthetic oil, you must use synthetic—not conventional. Check your manual, the oil cap label, or consult our team at Dann's Discount Auto Sales to confirm your vehicle's requirements.
Safety First: Car Maintenance Basics
Safety should always come first when performing any DIY oil change or car maintenance task. We want you to complete your project without injury, so follow these essential safety protocols.
Always wear proper safety equipment including nitrile gloves and safety glasses. Oil can be hot enough to cause serious burns, and splashes can damage your eyes. Protect yourself from the start.
Never trust a jack alone to support your vehicle. Jacks can slip or fail, causing the vehicle to fall and potentially crush you. Always use jack stands rated for your vehicle's weight, and place them on solid, level ground.
Be cautious around hot components. If you've just driven your vehicle, let the engine cool for at least 30 minutes before starting your oil change. Hot oil flows better for draining, but it can also burn you severely if you're not careful.
Work in a well-ventilated area, especially if you're in a garage. Oil fumes and exhaust can accumulate in enclosed spaces and cause health problems. Open doors and windows or use a fan to maintain air circulation.
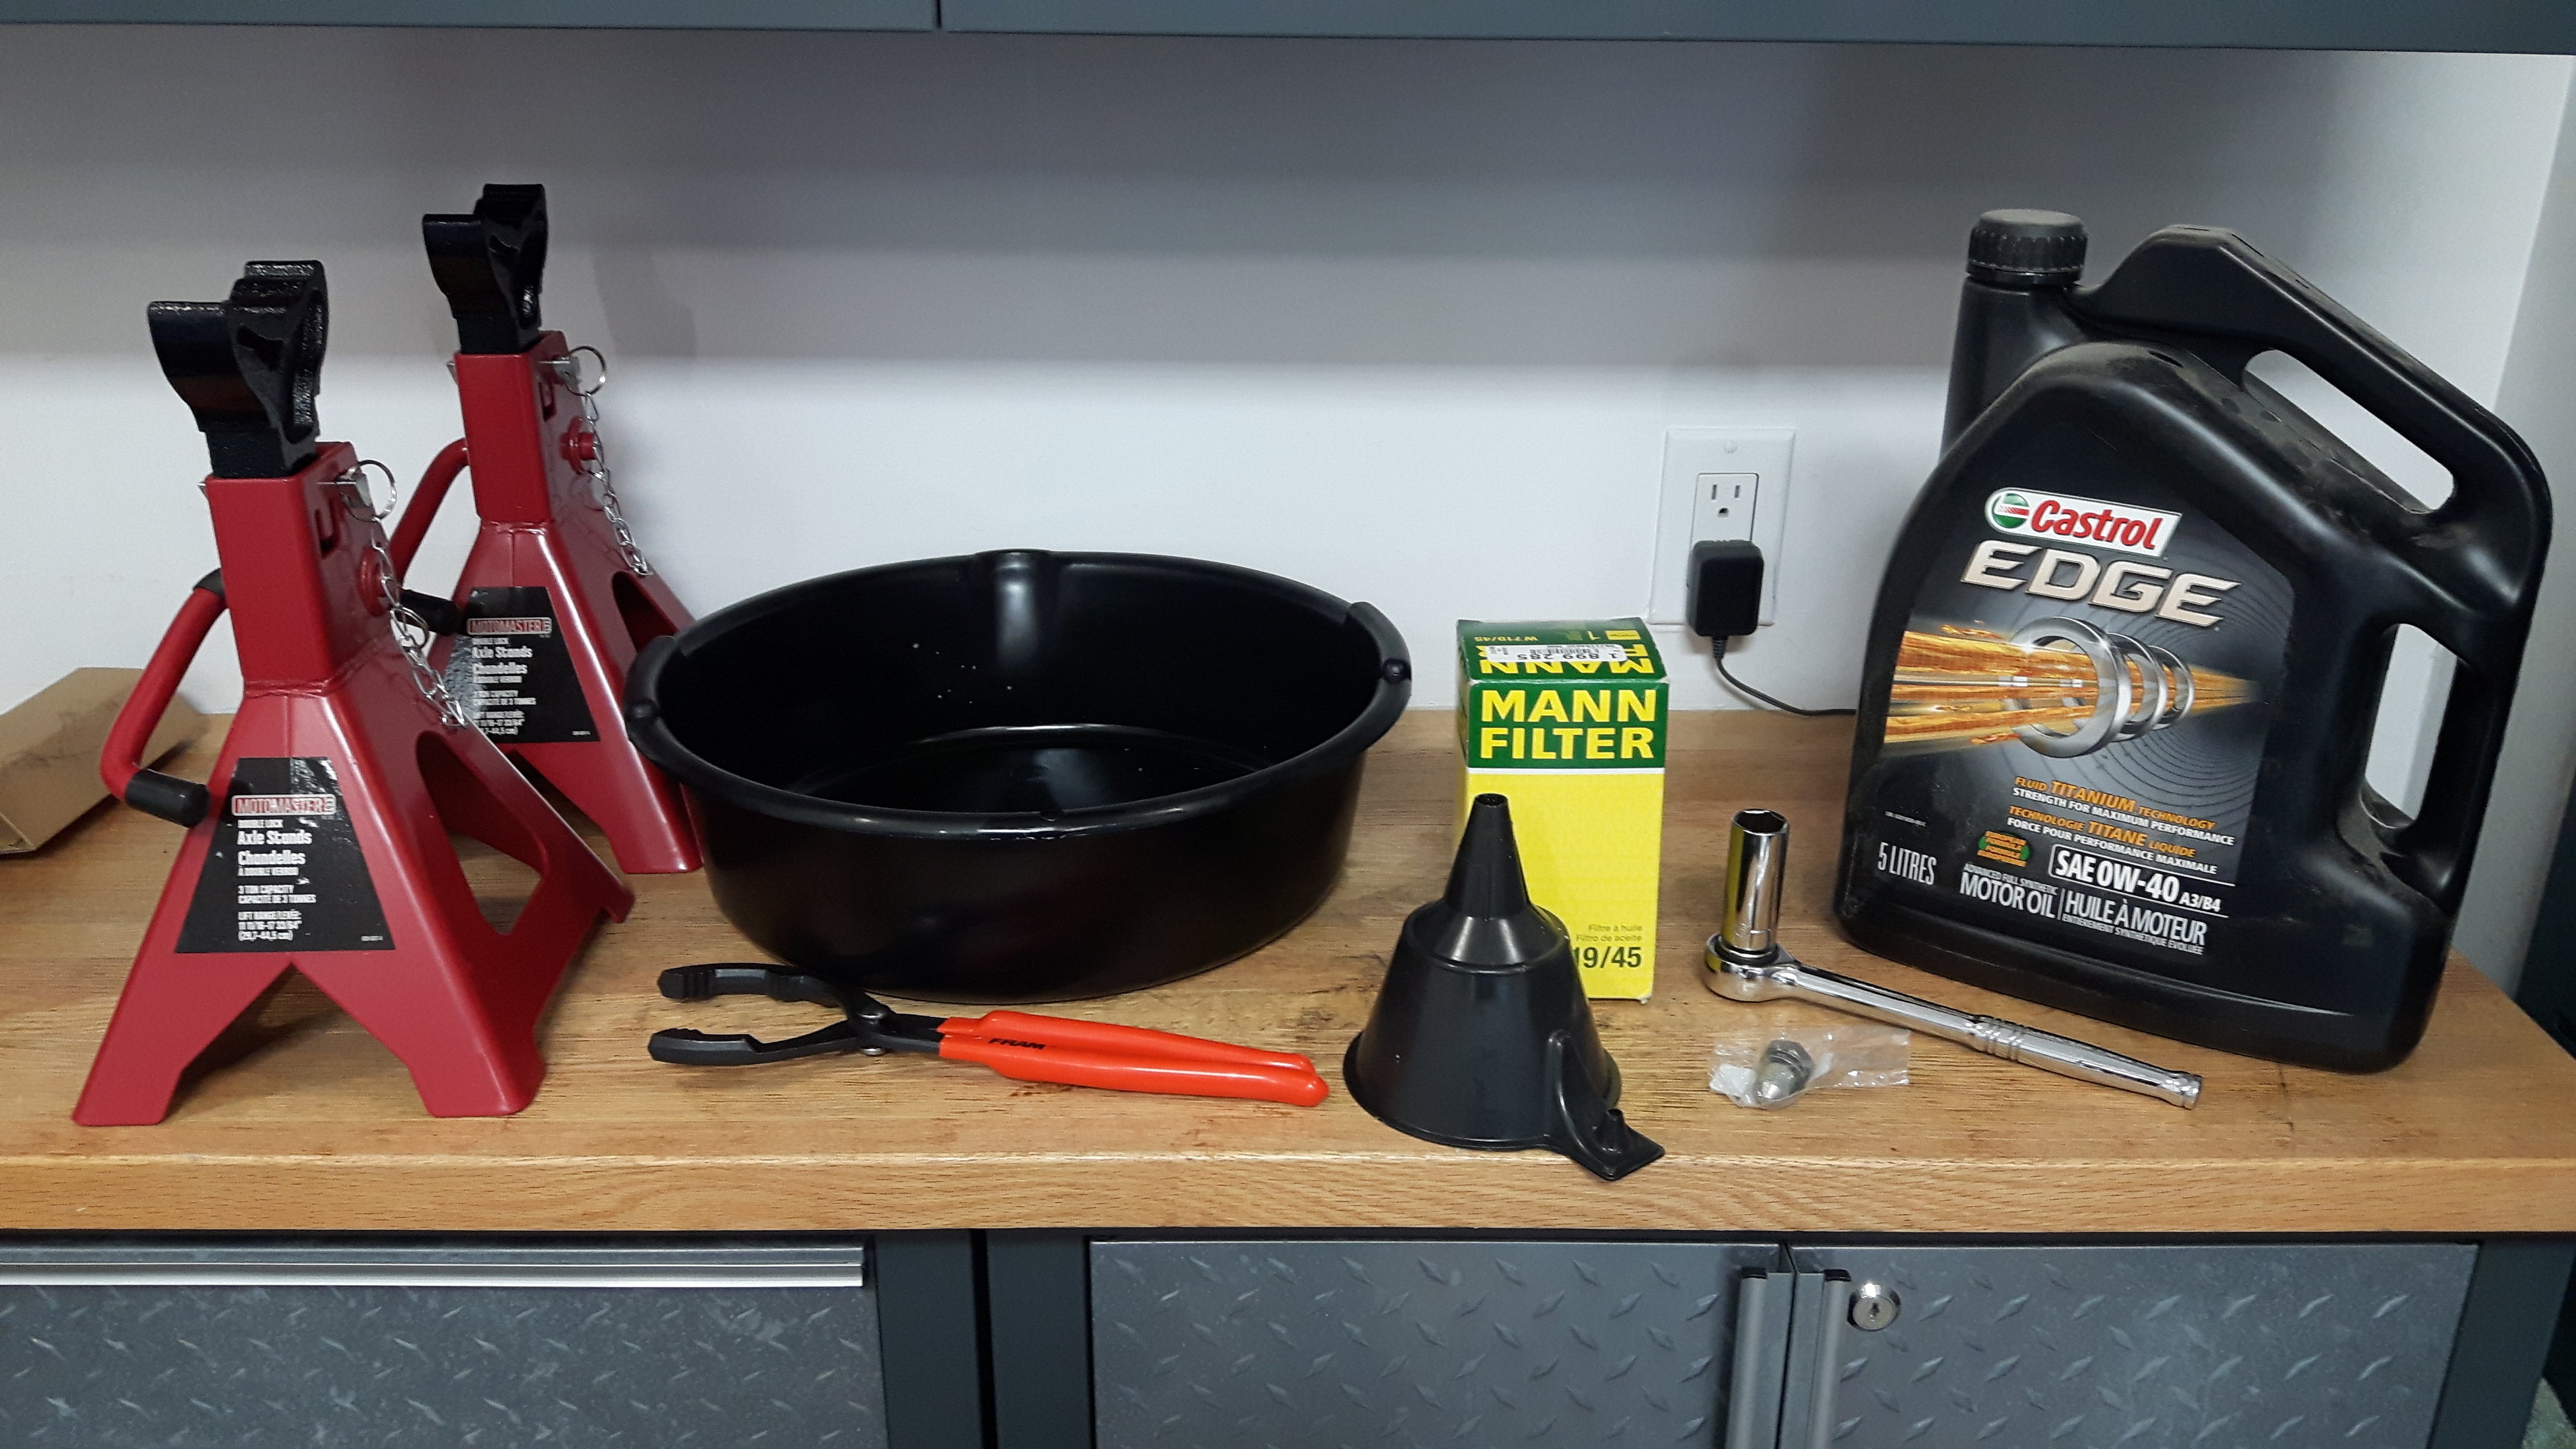
Having all your tools ready before starting makes the DIY oil change process smooth and efficient
How to Change Your Oil Step by Step Guide
Let's break down the engine oil replacement process into simple steps. This guide will walk you through each phase, designed to help you complete the task safely and correctly.
Before starting, make sure your engine is warm but not hot. This allows the oil to flow better. Wait about 15 minutes after driving your car.
Position and Secure Your Vehicle
Your safety is the first priority. Start by securing your vehicle properly. Park on a dry, level surface with enough room to work.
Slowly drive onto the ramps. Put the vehicle in park and engage the emergency brake. This prevents movement while working underneath. Use wheel chocks behind each rear wheel for extra security. Never work under a car held up only by a floor jack—it's dangerous.
Locate and Drain the Old Oil
Get underneath your vehicle to find the oil drain plug. Some cars have an undertray that may need removal. The plug is at the oil pan's lowest point.
Position a catch pan under the plug to collect the old oil. Use a socket wrench to loosen the plug counterclockwise. Then, remove it by hand to avoid spills.
The used oil is hot, so be careful. Let the engine drain for five minutes or until the flow slows. This ensures you remove as much old oil as possible. While the oil drains, check the drain plug and its washer. If the washer is damaged, replace it with a new one for a proper seal.
Oil Filter Replacement Process
The oil filter replacement is key to your engine's health. Find your oil filter—it's a softball-sized component on the engine block. It's usually accessible from underneath.
Loosen the filter by turning counterclockwise. Oil will start coming out the top. Wait until the flow subsides, then remove the filter.
Critical Step: Check the Old Gasket
Don't miss this step: check for the old oil-filter gasket. It must come off with the old filter. If it stays stuck to the engine, the new filter won't seal properly, causing dangerous leaks.
Apply a thin layer of fresh oil to the new filter's O-ring gasket. This helps create a better seal. Install the new filter by hand, turning clockwise until it's "hand tight," then give it a bit more—about three-quarters of a turn.
Reinstall Drain Plug and Add Fresh Oil
With the old oil drained and the new filter in place, button things up. Replace the drain plug and tighten it until snug, but don't overtighten. Overtightening can damage the oil pan threads, leading to expensive repairs.
If you have a torque wrench, use it to apply the manufacturer-specified torque setting. This ensures the plug is tight enough to prevent leaks without causing damage.
Now, move to the top of the engine and remove the oil filler cap. Using a funnel to avoid spills, pour in the manufacturer's indicated volume of new oil. Check your owner's manual for the exact amount—it's typically between 4 and 6 quarts, depending on your vehicle.
Replace the oil filler cap securely once you've added all the oil. This completes the refilling process for your engine oil replacement.
Check Levels and Inspect for Leaks
Quality control is essential to ensure your work was successful. Start your vehicle and let it run for about 10 seconds to allow the fresh oil to circulate through the engine. Some mechanics recommend running it for up to two minutes.
While the engine runs, slide under the vehicle and check for leaks around the drain plug and oil filter. Look carefully—even a small drip can become a problem. If you spot any leaks, shut off the engine immediately and address the issue.
After the engine has run briefly, shut it off and wait a minute for the oil to settle. Now use the dipstick to verify the oil level. Pull the dipstick out, wipe it clean with a rag, reinsert it fully, then remove it again.
Check where the oil line falls on the dipstick. It should be between the minimum and maximum marks, ideally near the full marking. If it's low, add a small amount of oil and check again.
Proper Oil Disposal and Cleanup
Responsible proper oil disposal is not only good for the environment—it's also required by law. Never pour used motor oil down drains, into the ground, or in the trash. Used oil is a hazardous material that must be recycled properly.
Many service stations and quick lube centers will accept used motor oil and filters at no charge. You can also find recycling locations near you by visiting Earth911.com or checking with your local waste management facility.
Pour the used oil from your catch pan into a sealed container for transport. Most auto parts stores sell containers specifically designed for this purpose, or you can reuse the empty bottles from your new oil.
Clean up any spills in your work area using absorbent materials like cat litter or commercial oil absorbent. Dispose of these materials according to local regulations for hazardous waste.

Congratulations on completing your DIY oil change—regular maintenance keeps your engine running smoothly for years
Keep Your Vehicle Running Strong with Regular Maintenance
Learning to do a DIY oil change is just the start. It's key to keeping your car running well for years. A good vehicle maintenance schedule is essential for engine longevity and performance.
How often you need to change your oil depends on the type. Conventional oil should be changed every 3,000 to 5,000 miles. On the other hand, full synthetic oils like Mobil 1 can go up to 10,000 miles without needing a change. Synthetic blends fall somewhere in between.
Conventional Oil
Change every 3,000-5,000 miles for optimal engine protection
Synthetic Blend
Change every 5,000-7,500 miles for balanced performance
Full Synthetic
Change every 7,500-10,000+ miles for extended protection
It's a good idea to keep a simple log in your glove box. Note the date, mileage, and oil type after each oil change. This log helps you stay on track and can even increase your car's value when you sell it.
Always check your owner's manual for specific advice on your car. Newer cars might need oil changes less often, while older ones might need them more frequently.
At Dann's Discount Auto Sales in Tulare, CA, we support car owners who take care of their vehicles. Our team is here to help with advice, quality parts, or professional service for any job. Regular maintenance keeps your engine running smoothly and saves you money on repairs.
Visit Dann's Discount Auto Sales for All Your Automotive Needs
Congratulations—you've learned how to perform your own DIY oil change! Following a regular vehicle maintenance schedule with oil changes every 3,000 to 5,000 miles (or as your manufacturer recommends) will keep your engine running smoothly for years.
While we're confident you can handle this task, remember that the team at Dann's Discount Auto Sales in Tulare, CA is always here if you prefer professional service or encounter any challenges along the way.
Whether you need advice on the right oil for your vehicle, help finding quality parts, or you're looking for your next reliable car, our knowledgeable staff is ready to assist you. We're committed to helping Tulare drivers keep their vehicles in top condition.
Stop by our dealership today or give us a call to learn more about our inventory and services. We look forward to serving you!